

The Anatomy of a Great Cursor Prompt
The 5 building blocks that make AI build what you actually want

This is Part 2 of a 3-part series on building apps with Cursor.
Part 1 covered how to talk to Cursor using context and instructions. This part breaks down the invisible structure behind prompts that generate clean, professional code. Part 3 will show you real workflows to ship a complete app.
You’ve learned how to give Cursor context and instructions. But here’s what nobody tells you: specificity alone isn’t enough.
You can write a detailed prompt and still get mediocre results. The code works, but it’s messy. Or it looks good but breaks when you add the next feature. Or it’s almost right but something feels off.
The difference between “okay” code and “this is actually good” code comes down to structure.
Great prompts have an invisible anatomy, a set of building blocks that guide the Cursor agent toward better decisions. Once you understand these blocks, you stop hoping your prompts work and start knowing they will.
This article breaks down the 5 core components every strong prompt needs and shows you how to use them to build features that work the first time.
Why Some Prompts Work Better Than Others
The Cursor agent isn’t guessing when it builds your app. It’s making decisions.
Every time you prompt, Cursor decides:
Which libraries to use
How to structure the code
What styles to apply
How components should interact
Whether to add error handling
When your prompt is vague, Cursor makes those decisions based on general patterns it’s learned. That’s why you get generic output.
When your prompt has structure, Cursor makes decisions based on your priorities. That’s when output gets good.
With Cursor 2.0’s new Composer model, these decisions happen faster (under 30 seconds for most tasks) and with better codebase awareness. But speed doesn’t fix bad prompts… it just delivers mediocre results faster!
Your goal is to give the Composer model the structure it needs to make your decisions, not generic ones.
The 5 Building Blocks of a Great Cursor Prompt
Every strong prompt contains these 5 components:
Context: What Cursor needs to know about your app
Action: What you want it to build or change
Constraints: What it should NOT do
Style: How it should look and behave
Validation: How you’ll know it worked
Let’s break each one down.
1. Context: Tell Cursor What It’s Building For
Context is background information. It helps Cursor understand why something exists, so it makes better choices about implementation.
Bad prompt (no context):
Add a dashboardGood prompt (with context):
[Context]
This is a SaaS analytics dashboard for small business owners.
Users log in to see their monthly sales data.
The app uses a blue/white color scheme with rounded corners.

[Action]
Add a dashboard page...
Notice what context does:
It tells Cursor who the user is (small business owners)
It explains what they’re doing (viewing sales data)
It defines existing style (blue/white, rounded corners)
Now when Cursor builds the dashboard, it makes decisions that fit your app.
2. Action: Be Specific About What You Want
This is the what of your prompt. The clearer you are, the better Cursor performs.
Vague action:
Add a formSpecific action:
Create a contact form with:
- Name field (text input)
- Email field (text input, must validate email format)
- Message field (text area, 4 rows tall)
- Submit button at the bottom
Specificity eliminates guesswork. Cursor now knows exactly what to build.
Structure actions in layers:
Layout first: “Three cards in a horizontal row”
Content second: “Each card has a title, description, and icon”
Interaction third: “Cards lift on hover”
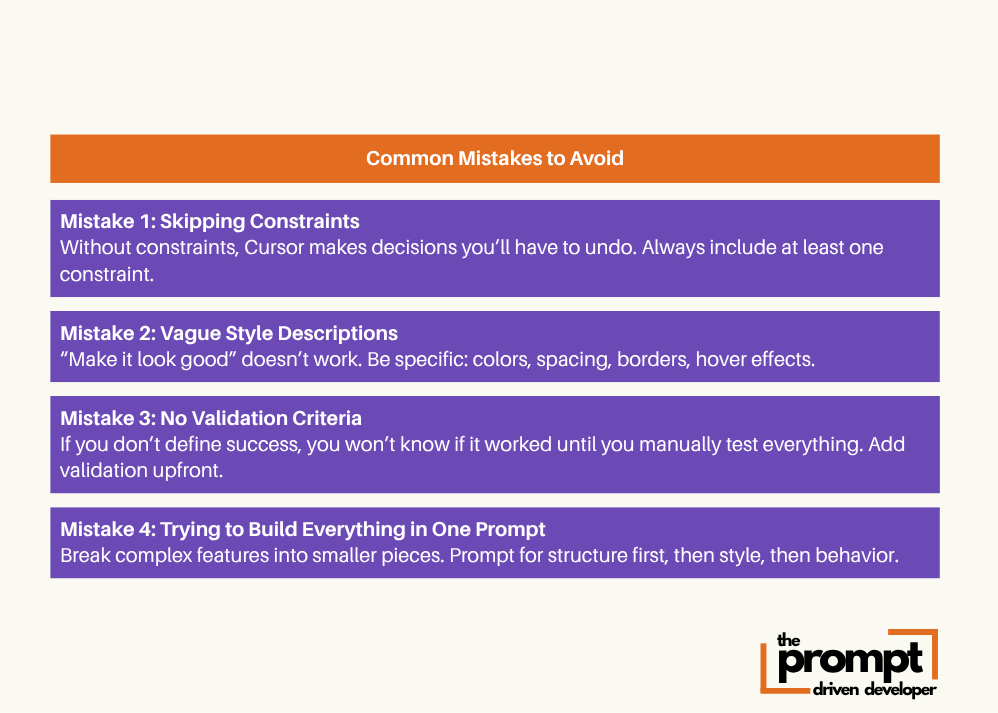
This layered approach keeps prompts readable and gives Cursor a logical build order.
3. Constraints: Tell Cursor What NOT to Do
This is the secret weapon most people skip. Constraints prevent bad code before it happens.
Example constraints:
Constraints:
- Don’t use inline styles—use Tailwind classes only
- Keep all spacing consistent at 16px or 32px
- Don’t add features I didn’t ask for
- Make sure this works on mobile screens
Constraints are guardrails. They keep Cursor from making decisions you’ll have to undo later.
Common constraints to use:
“Don’t hardcode colors, use the existing brand color palette”
“Keep components under 150 lines”
“Don’t install new packages without asking”
“Follow the same structure as [existing component]”
With Cursor 2.0’s Composer model, constraints become even more important. Composer is fast and can generate a lot of code quickly but that speed is only useful if it’s building in the right direction. Constraints keep it on track.
4. Style: Define How It Should Look and Behave
Style is how your app feels. It’s spacing, colors, borders, animations, typography.
Most people think they need to know CSS to control style. You don’t. You just need to be descriptive.
Example style block:
Style:
- Background: white card with soft shadow
- Borders: rounded corners (12px)
- Spacing: 32px padding inside the card
- Button: blue background (#3B82F6), white text, rounded (8px)
- Hover: button lifts slightly with a smooth transition
You’re describing what you see in your head. Cursor translates that into code.
Pro tip: Create a “brand guidelines” rule you reuse across features:
Brand Guidelines:
- Primary color: #3B82F6 (blue)
- All cards have 12px rounded corners
- Spacing uses 8px grid (8, 16, 24, 32, 40...)
- Buttons are full-width on mobile, auto-width on desktop
- Font: Inter, 16px body text, 24px headings
Save this as a snippet as a rule.md doc. Now Cursor builds everything in a consistent style automatically.
5. Validation: Define Success Criteria
Validation tells Cursor (and you) how to know if it worked.
Example validation:
Validation:
- Form submits when I click the button
- Error message shows if email field is empty
- Success message appears after submission
- Form clears after successful submit
This is huge for non-technical builders. You’re defining what success looks like without needing to know how to test code.
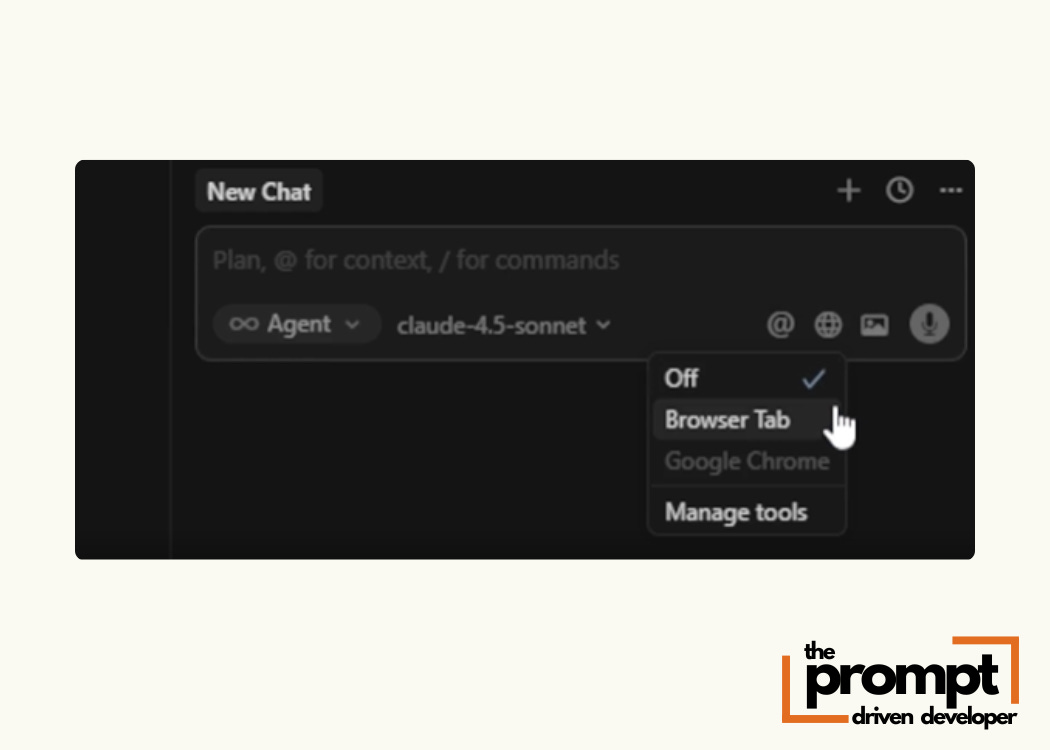
With Cursor 2.0’s native browser tool, agents can now test their own work. If you include validation criteria in your prompt, Composer can iterate until it passes your tests without you manually checking each change.
Example prompt with validation:
[Action]
Add a signup form with Name, Email, and Password fields.

[Validation]
Test this by:
1. Submitting with empty fields—error messages should appear
2. Submitting with valid data—success message should show
3. Checking mobile view—form should stack vertically

Use the browser tool to verify these work before finishing.
Now Composer will build, test and fix until all validation criteria pass.
Putting It All Together: Full Prompt Anatomy
Here’s how all 5 building blocks work together:
Bad Prompt:
Add a pricing sectionGreat Prompt (Full Anatomy):
[Context]
This is for a SaaS landing page targeting freelancers.
The site uses a clean, modern style with blue accents (#3B82F6) and rounded corners.

[Action]
Add a pricing section below the features section.
Create three pricing cards arranged horizontally:
- Free plan: $0/month, includes 3 features
- Pro plan: $20/month, includes 8 features, highlight this one
- Enterprise plan: Custom pricing, includes all features

Each card has:
- Plan name at top (bold, 24px)
- Price below name (large, 32px)
- Feature list (5 items, checkmarks)
- CTA button at bottom

[Constraints]
- Don’t add animations I didn’t ask for
- Keep spacing consistent with the rest of the page (32px between sections)
- Don’t install new packages
- Make sure cards stack vertically on mobile

[Style]
- Cards: white background, soft shadow, rounded corners (12px)
- Highlight the Pro plan with a blue border
- Buttons: blue background for Pro, gray for others
- Hover effect: cards lift slightly

[Validation]
- All three cards display side-by-side on desktop
- Cards stack vertically on mobile (under 768px width)
- Pro plan clearly stands out with blue border
- Buttons are clickable and styled correctly
That’s a complete prompt. Cursor now has everything it needs to build exactly what you want with no guesswork.
Prompt Templates You Can Copy
Here are reusable templates for common scenarios. Fill in the brackets and you’re good to go.
Template 1: New Component
[Context]
[Describe your app and who uses it]

[Action]
Create a [component name] with:
- [Feature 1]
- [Feature 2]
- [Feature 3]

[Constraints]
- Don’t [thing you don’t want]
- Keep [consistency rule]

[Style]
- [Color/spacing/layout details]

[Validation]
- [How to test it works]
Template 2: Modification
[Action]
In the [component name], change:
- [Specific edit 1]
- [Specific edit 2]

[Constraints]
- Don’t break [existing functionality]

[Validation]
- [Existing feature] still works
- [New change] is visible
Template 3: Complex Feature
[Context]
[User scenario: who, what, why]

[Action]
Build a [feature name] that:
1. [Step 1]
2. [Step 2]
3. [Step 3]

[Constraints]
- Follow the same pattern as [existing feature]
- Use [specific library/tool]

[Style]
- Match the design of [reference component]

[Validation]
- Test by [action 1] → [expected result]
- Test by [action 2] → [expected result]
How Cursor 2.0 Changes the Prompting Game
Cursor 2.0 introduces features that make structured prompting even more powerful:
1. Multi-Agent Workflows You can now run up to 8 agents in parallel, each working on a different part of your app. With structured prompts, you can:
Give Agent 1 your context + feature A
Give Agent 2 the same context + feature B
Review both outputs and merge the best parts
This is massive for non-technical builders.
2. Composer Model Speed Composer completes most tasks in under 30 seconds. Fast iteration means you can test prompt variations quickly and learn what works without waiting.
3. Native Browser Testing Include validation criteria in your prompts, and Composer can test the output itself using the built-in browser. This removes the manual “did it work?” step and lets you focus on the next feature.
Your Prompts Are Your Product Specs
Here’s the mindset shift: Prompts aren’t requests. They’re specifications.
When you give Cursor a structured prompt with all 5 building blocks, you’re not asking it to guess what you want. You’re giving it a blueprint.
The better your specs, the better your product.
You don’t need to learn code. You need to learn how to write clear, structured specifications that Cursor can execute.
That’s the skill that matters.
Coming Next:
You’ve learned how to talk to Cursor. You’ve learned the anatomy of a great prompt.
In Part 3, I’ll show you real workflows for building a complete app from scratch. You’ll see exactly when to use Ask vs. Plan vs. Agent mode and how to structure a build from idea to deployment,
See you in Part 3 👋

This is very well put together. I wonder where the sota is these days in tools such as these, or related industry techniques, offering an integrated end-to-end testing (as accessible to the vibe-coding folk) including user acceptance and validation, all perhaps within a CI/CD setup..